

01
Nov
MG90S, Metal Gear and More Torque
Draft. This tutorial has not been checked against the physical product yet. Confirm wiring, pin assignments and voltage limits against the product documentation before building it.
| Difficulty | Intermediate |
|---|---|
| Category | Motion |
| Supported boards | Arduino Uno R3 and compatible ATmega328P boards |
| Time needed | 40 minutes |
| Prerequisites | Controlling an SG90 Servo |
| Tested board | Not yet verified |
| Tested on | Not yet verified |
| Arduino IDE version | Not yet verified |
| Library | Not yet verified |
What it does
The same servo as the SG90, built properly. Same size, same three wires, same control signal, same library, same code — and metal gears, ball bearings and about a third more weight.
Siratek lists it as the SG90 upgraded version, which is fair. This page is therefore short and is about one question: what changes when the gears stop being the weak point?
Before you begin
Required parts and tools
- An Arduino Uno or compatible board.
- One MG90S servo. This is Siratek product 2758.
- A separate 5 V supply, for anything past a first test.
- Three jumper wires.
Read Controlling an SG90 Servo first. Everything there about the three wires, the pulse, the Servo library and the Timer1 conflict applies here unchanged, and this page does not repeat it.
What the listing says
From the Siratek product information:
| Model | MG90S |
| Weight | 12 g |
| Dimensions | 22.6 x 12.1 x 22.5 mm |
| Voltage | 4.8 to 6.0 V |
| Torque | 1.6 kg-cm at 4.8 V, 1.8 kg-cm at 6.0 V |
| Speed | 0.10 s per 60 degrees at 4.8 V, 0.09 s at 6.0 V |
| Dead band | 5 microseconds |
| Lead length | 250 mm |
| Gears | Metal, with full ball bearing |
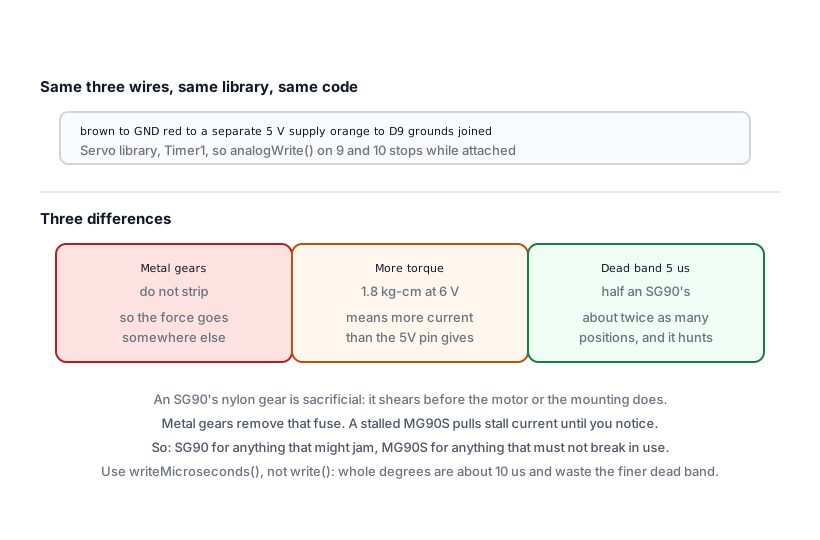
Three of those repay a moment’s thought, and they are the three differences that matter.
Difference 1: the gears do not strip, and that is not purely good
An SG90’s nylon gears are the part that fails. Jam the horn, or let the servo push against a mechanical stop, and a tooth shears. It is annoying, and it is also sacrificial: the gear gives way before the motor burns out or the mounting tears off.
Metal gears do not shear. The force goes somewhere else instead — into the motor, into the bearing, into whatever the servo is bolted to, or into the servo’s own case.
So the practical advice is the opposite of what “stronger” suggests:
- Find the real limits before you load it. The SG90 page has the procedure for finding where a servo stops responding, and it matters more here, because the warning sign of exceeding them is no longer a cheap broken gear.
- A stalled MG90S keeps pulling stall current for as long as you leave it there. It gets hot. Nothing inside gives way to stop you.
- Never drive it against a hard stop on purpose. On an SG90 that costs you a gear; here it costs you a motor or a mount.
Difference 2: more torque means more current
The listing gives torque, not current, which is the usual omission.
Expect this servo to draw noticeably more than an SG90 under load, with a stall current commonly quoted in the hundreds of milliamps and comfortably over an amp for larger metal-gear servos. The Uno’s 5V pin cannot supply that, and the symptom of trying is the board resetting whenever the servo starts moving.
The rule from the SG90 page becomes firmer rather than different: a separate 5 V supply for anything beyond a first bench test, with the grounds joined.
Measure your own figure if it matters. Measuring Current with an ACS712 and Using a Multimeter both cover putting a meter in series with the servo’s red wire, and the number you get is worth more than any figure on a listing.
Difference 3: the dead band is 5 microseconds
The dead band is how small a change in pulse width the servo will bother to respond to. Below it, the servo ignores you.
5 microseconds is tight — an SG90’s is commonly 10 — and in a 1000 microsecond span from one end of travel to the other, it means this servo can resolve roughly twice as many distinct positions.
Two consequences:
writeMicroseconds()is worth using.write()takes whole degrees, which is about 10 microseconds per step, so it cannot ask for anything finer than the servo can now do. The example below uses microseconds for this reason.- It hunts more. A tighter dead band means the servo notices small errors and corrects them, so it buzzes slightly where an SG90 would have sat still. That is the mechanism working, not a fault, though it does mean an idle MG90S is noisier.
Which to use for what
| Use | Choose |
|---|---|
| First experiments, learning the pulse | SG90, and keep a spare |
| A moving part in a project that will be handled | MG90S |
| Anything geared to a load, or lifting | MG90S |
| Anything that might jam | SG90, so a cheap gear gives way |
| Fine positioning, a camera mount, a pointer | MG90S, for the dead band |
| Many servos on one supply | Whichever, and budget the current |
Pin reference
Identical to the SG90.
| Wire | Connect to | Purpose | Notes |
|---|---|---|---|
| Brown | Uno GND |
Ground | And to the separate supply’s ground |
| Red | Separate 5 V supply | Power | The Uno’s 5V pin only for a first test |
| Orange | Uno D9 |
Signal | Any digital pin |
Wiring steps
As Controlling an SG90 Servo, with one emphasis: wire the separate supply from the start rather than discovering you need it. This servo is the one that makes the point.
Software and libraries
Servo, which ships with the Arduino IDE. Nothing to install.
It uses Timer1 on an Uno, so analogWrite() on pins 9 and 10 stops working while a servo is attached. The SG90 page explains it; it is unchanged here.
Minimal working example
// Siratek: sweep an MG90S, using microseconds rather than degrees
// so the 5 microsecond dead band is not wasted.

#include <Servo.h>

Servo arm;

// Conservative limits. Find your own with the procedure on the SG90 page.
const int MIN_PULSE = 1000;
const int MAX_PULSE = 2000;

void setup() {
  arm.attach(9, MIN_PULSE, MAX_PULSE);
  Serial.begin(9600);
  Serial.println(F("Siratek: sweeping in 10 microsecond steps."));
}

void loop() {
  for (int pulse = MIN_PULSE; pulse <= MAX_PULSE; pulse += 10) {
    arm.writeMicroseconds(pulse);
    delay(20);
  }
  for (int pulse = MAX_PULSE; pulse >= MIN_PULSE; pulse -= 10) {
    arm.writeMicroseconds(pulse);
    delay(20);
  }
}
attach() is given the limits. Passing them means the library will never send a pulse outside them, whatever the rest of your sketch asks for — which is the software half of not driving a metal-gear servo into a stop.
Seeing what the dead band buys you
// Siratek: step by 5 microseconds and watch where it actually moves.

void loop() {
  for (int pulse = 1450; pulse <= 1550; pulse += 5) {
    arm.writeMicroseconds(pulse);
    Serial.println(pulse);
    delay(600);
  }
}
Watch the horn against a fixed mark. On this servo most of those 5 microsecond steps should produce visible movement; on an SG90, roughly every other one does nothing.
That is the difference in one experiment, and it is the reason to pay for this servo in a pointing or tracking application rather than a lifting one.
Expected result
A smooth sweep, quieter and more positive than an SG90, with an audible small buzz when it is holding a position against any load at all.
Nothing should get hot. A warm servo that has not been moving is a servo being held against something.
Troubleshooting
| Symptom | Likely cause | Check or fix |
|---|---|---|
| Board resets when it moves | Running from the Uno’s 5V |
Separate supply, grounds joined |
| Buzzes constantly while idle | Tight dead band, or a load | Expected to a degree; check for binding |
| Gets hot, does not move | Stalled against a stop | Nothing inside will give way; remove the stop |
| Hums at the end of travel | Driven past its real limit | Find the limits, pass them to attach() |
| No movement at all | Signal pin, or supply | An LED on the signal pin proves the wiring |
| LED on pin 9 or 10 will not dim | Servo has taken Timer1 |
Move it to 3, 5, 6 or 11 |
| Jitters when other code runs | Interrupts blocked elsewhere | See Responding Immediately with Interrupts |
| Two servos, both erratic | One supply, not enough current | Budget for both at once |
| Moves less far than an SG90 did | Different limits on this part | They vary; measure yours |
| Something broke that was not a gear | The gears no longer fail first | That is the trade |
Next steps
- Easier first: Controlling an SG90 Servo, which this page assumes throughout.
- Related products: the SG90 for learning, and the L298N for motors that turn continuously rather than to a position.
- Next project: a pan and tilt mount for the ESP32-CAM, where the tight dead band and the metal gears both earn their place.
Sources and attribution
All text, wiring guidance and code in this tutorial are original Siratek work.
- The weight, dimensions, voltage range, torque and speed figures at both voltages, the 5 microsecond dead band, the 250 mm lead and the metal gear and ball bearing construction are from the Siratek product information for item 2758, which also describes the part as the SG90 upgraded version.
- Servo signalling, the
Servolibrary’s use of Timer1 and the separate-supply rule are as set out in Controlling an SG90 Servo.
Current draw is not given on the listing, so this page describes the direction of the difference and points at a measurement rather than asserting a figure. The comparison of dead bands uses the SG90’s commonly quoted value rather than a measurement of the Siratek part. This tutorial has not yet been built and run on hardware. No third-party tutorial text, diagrams, photographs or code has been reproduced here.